This section describes how to add MOCA iOS SDK to your app.
Minumum OS supported: iOS 10
Option A: Cocoapods
CocoaPods is a dependency manager for Objective-C projects. Learn more here.
- If you haven't already, install CocoaPods by executing the following:
$ sudo gem install cocoapods
-
If you encounter any issues installing cocoapods, please refer to their getting started guide
-
Create a plain text file named Podfile (or use
touch Podfilefrom the command line) in the Xcode project directory with the following content:
target 'YOUR_TARGET_NAME' do
       pod 'MOCA', '~> 3.10.5'
end
Please check what is the latest version of the SDK by here
- Install MOCA SDK by executing the following in the Xcode project directory:
pod install
- Open the project workspace (
<yourProject>.xcworkspace) instead of the project file (<yourProject>.xcodeproj) to ensure that the MOCA SDK dependency is properly loaded.
Swift additional steps
Swift
When you add Objective-C header files into your Swift project, Xcode will ask you to create a Bridging Header file. This file allows Xcode to translate the Objective-C methods to Swift. This bridging file allows you to use MOCA SDK methods in Swift.
In order to use the MOCA Header symbols in your Swift application, you'll need to create a Bridging Header file.
1 - Download the file (or create a new one).
2 - Copy it to your Xcode project. Ensure you select "copy if needed" in the copy dialog box.
3 - Add the Bridging header to your Xcode Project.
Ensure you have selected "All" options instead of "Basic"
Otherwise the option could remain hidden.

Option B: Swift Package Manager
You can integrate the MOCA iOS SDK 3.11.0+ into your app using Swift Package Manager (SPM). Follow these steps:
-
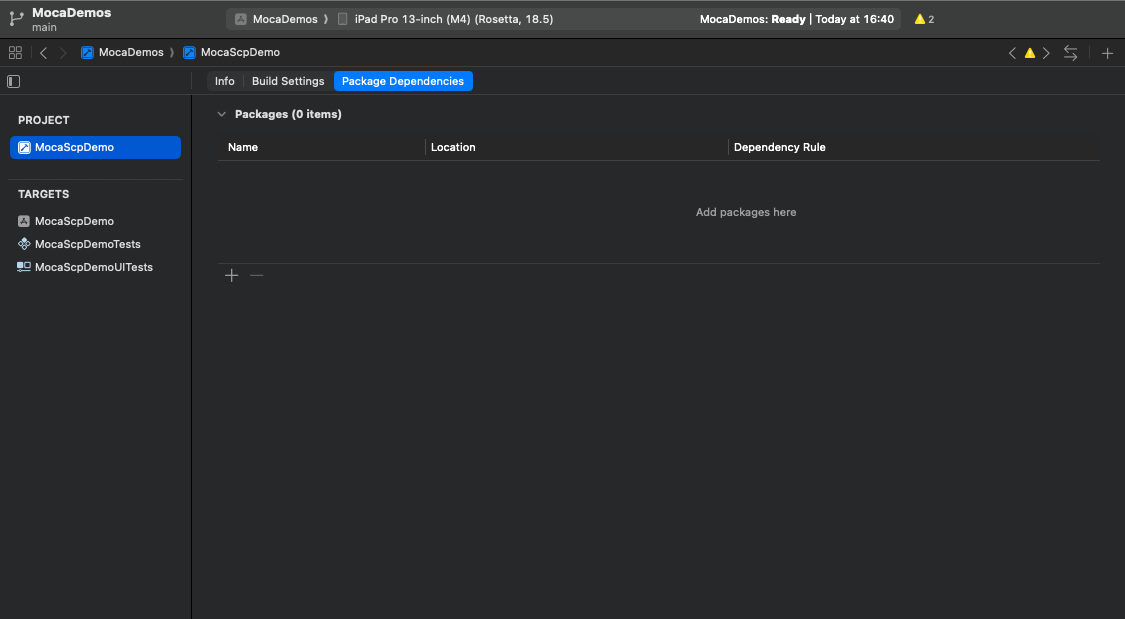
In Xcode, open your project, and go to the Package dependencies tab of the project settings.
-
Add a new package by clicking on the plus sign (+):
-
In the search bar, enter the MOCA iOS SDK Git repository URL: https://github.com/mocaplatform/moca-ios-spm.
-
Choose the version requirement:
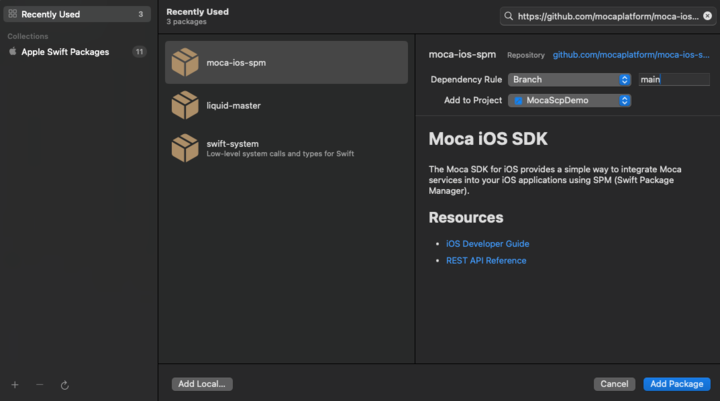
- Up to Next Major:
3.11.0(or current version). - Exact Version:
3.11.2 - Branch / Commit: as needed for development.
- Up to Next Major:
-
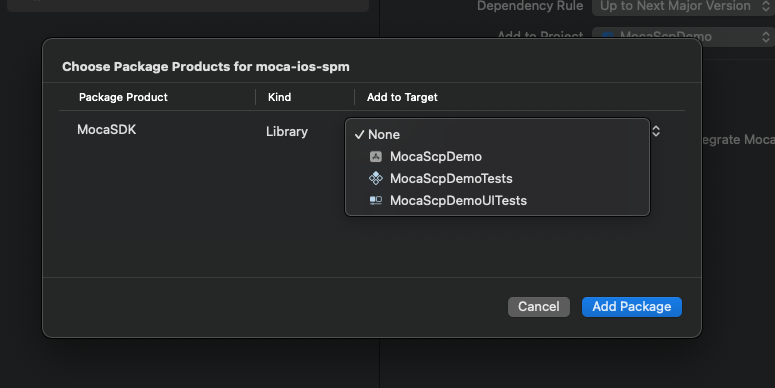
Add package by choosing the Target and clicking on Add Package:
-
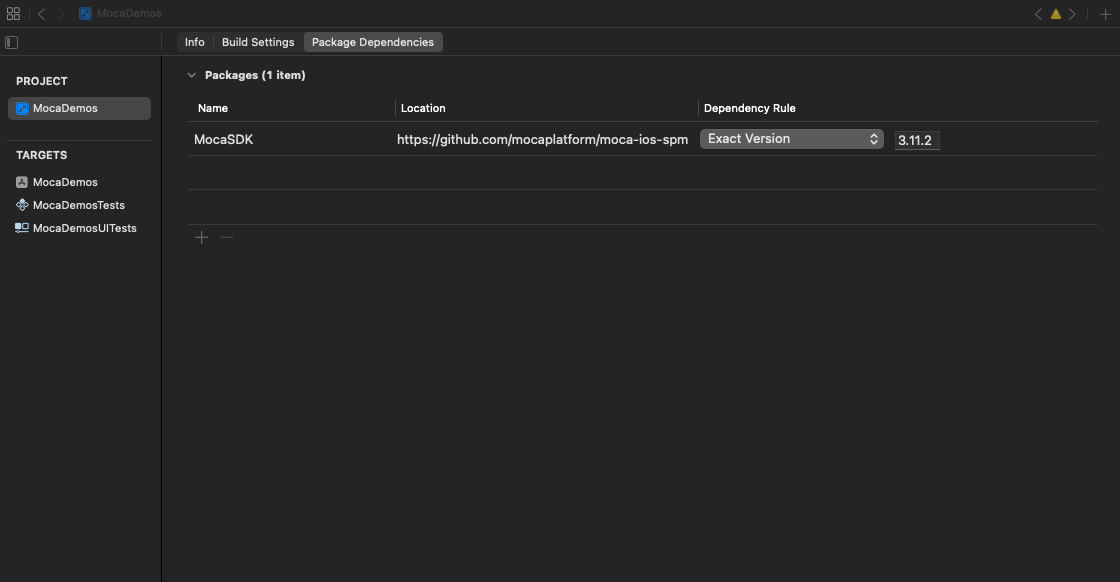
After SPM finishes resolving, confirm that the package appears under Project > Swift Packages:
-
In your AppDelegate, import the SDK via import MocaSDK:
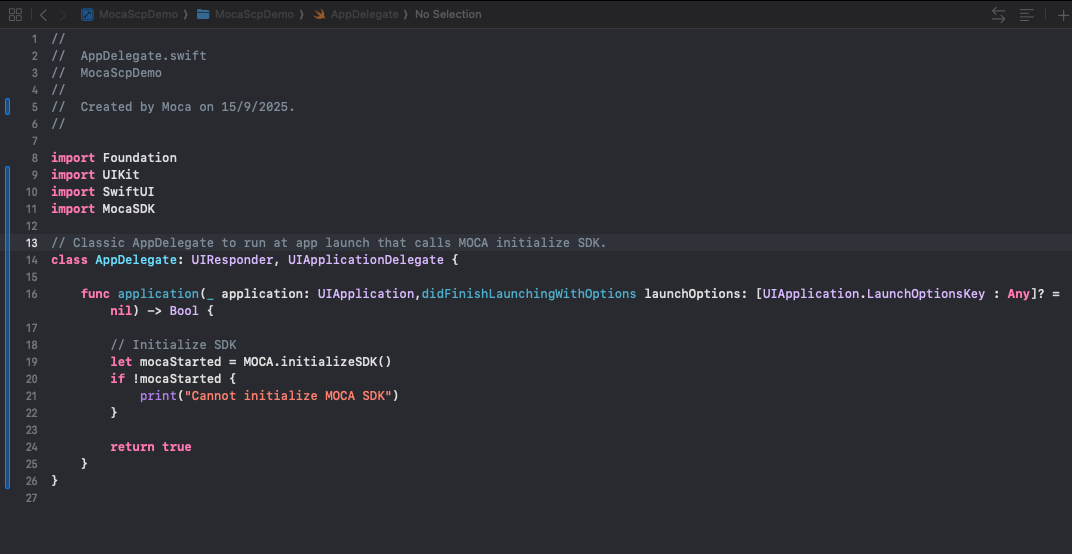
-
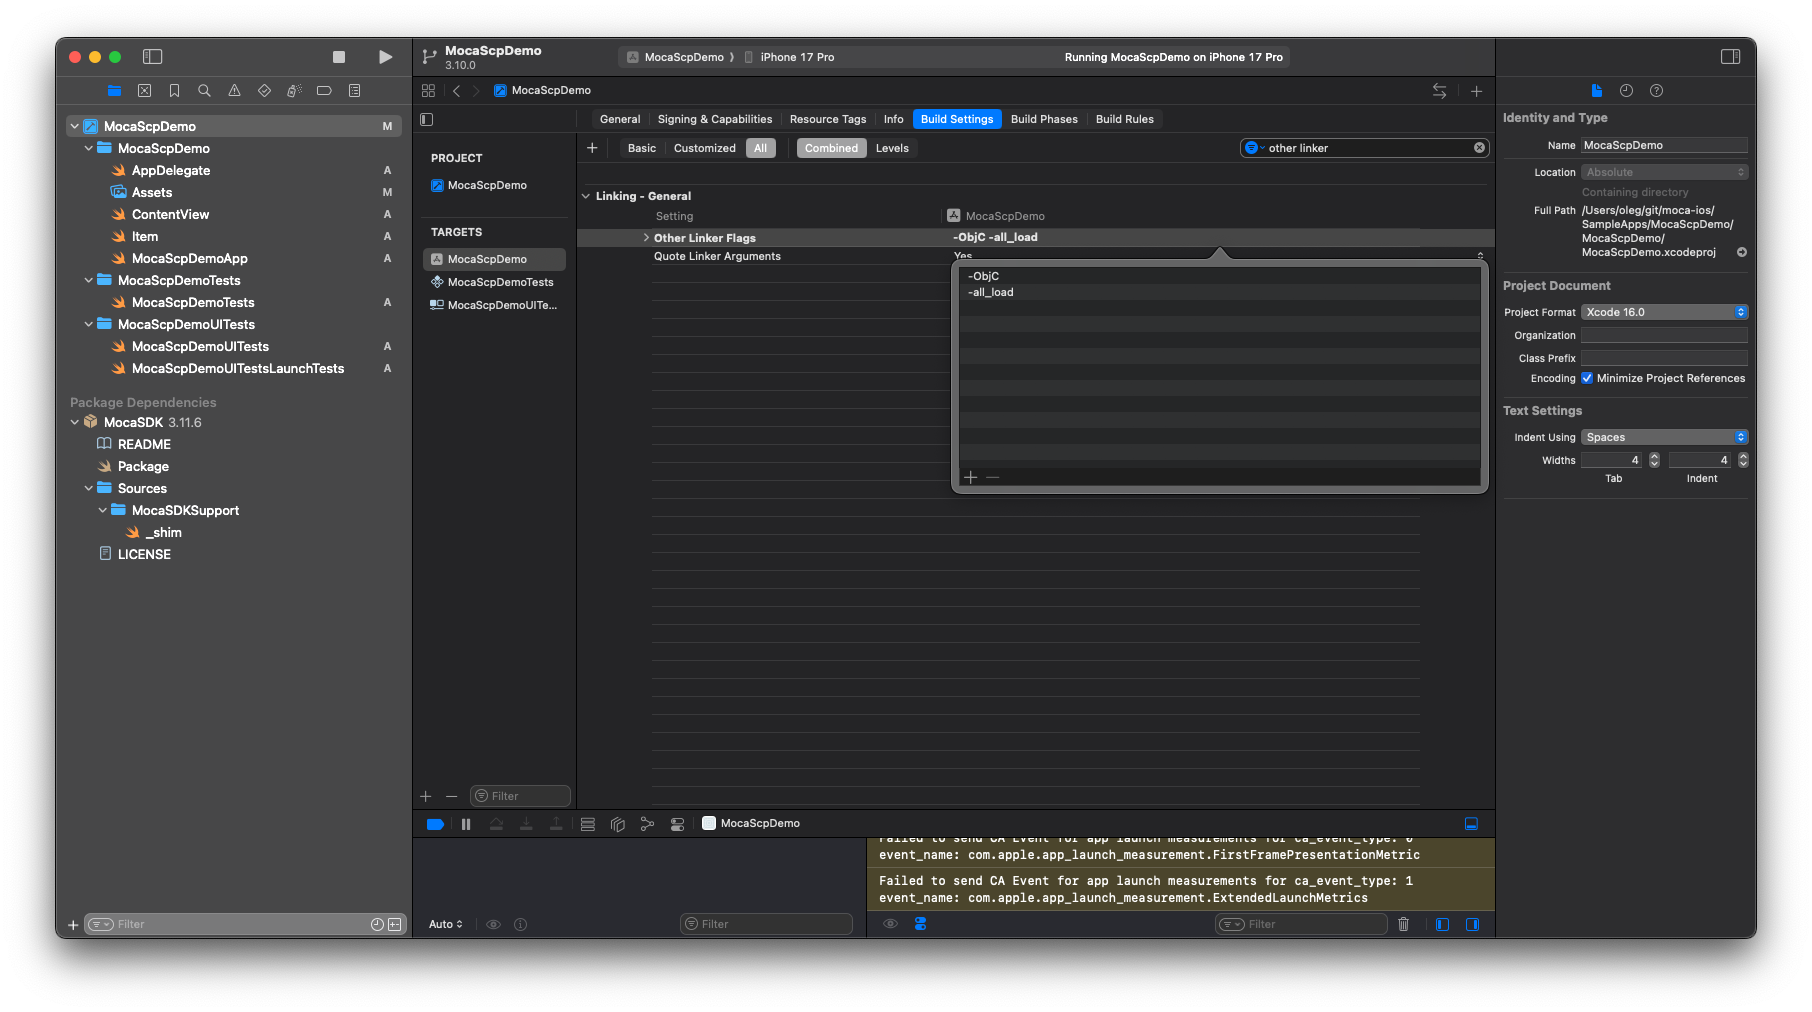
Go to Build Settings and, under Linking - General add Other Linker Flags -ObjC and -all_load:
-
SPM Checklist:
Verify the following before building your app:
- The MocaSDK package appears under Package Dependencies in Xcode.
- The version shown matches the one you selected.
- Your app target includes MocaSDK in Frameworks, Libraries, and Embedded Content.
- You can import MocaSDK in Swift files without errors.
- The Other Linker Flags contains -ObjC and -all_load lines.
- The project builds successfully.